The Creation of a Pattern Welded Blade Part Two: Wire Damascus by Robert P. Shyan-Norwalt
(To read the first part of this tutorial please click here.)
Let’s talk about wire “damascus”. It’s not really wire. It’s not really pattern-welded steel, and it’s not really Damascus, but it’s fun and easy to do. It’s a great first project, and you can find your stock in any scrap-yard in the world. Almost fool-proof for a beginner so far as mistakes are concerned, and if manipulated properly can produce some striking results in terms of pattern. I’ve sold a few small knives as letter openers, and I’ve used it to make “Celtic” pommels, and guards, as well as chapes, accents for scabbards, and jewelry. I’ve used it to trade for chain mail, and other stuff I choose not to take the time to do myself. Among the better Master Blade-smiths, at the larger Blade Shows it will be “poo-poo’ed” as “cheesy” but that’s okay for me, as I’m an up and comer, and also the kind of guy that really doesn’t feel bad that I didn’t come out of the womb knowing everything. It’s pretty, and if made from high carbon suspension bridge, or industrial cable (non-galvanized ) makes for a pretty good knife, short sword, and if you weld on a solid edge… sword. I’ve seen stuff by Colonel Hrisoulas and Charles Kain that rivals anything, by anyone, ever, out of cable.

A sample piece of cable
Lots of guys start off with wire, and others take it on to an art-form. I know a few that have stuck with it, and make great table cutlery, and artwork to dazzle. Google the expression “Wire Damascus” and see some of the books in the bibliography at the end of this tutorial, and see good shots of some magnificent pieces. I myself have done a few, and have on hand enough bridge and crane cable to make much more in the future.
Here’s how.
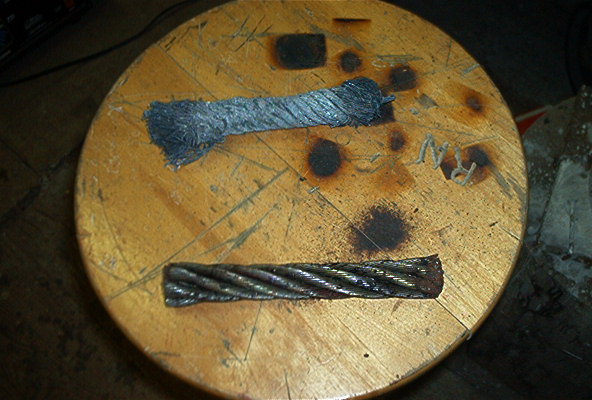
High carbon spring steel cable on top; low carbon on bottom
Here are two very different sections of cable. It’s hard to spark test them for carbon, especially as you pick them up as scrap, and as so many small strands of steel don’t “spark off” the same way a bar or larger hunk of ferrous metals do. Also, the cable market is very high-tech, and each type of cable is meant to be used for a certain load ratio, stretch, torsion, tension, and all that. And so too the strands may differ in carbon content in a drastic fashion. The one on the top is High Carbon spring steel. 2″ diameter, and very highly sought after, in terms of value. To buy it new is quite expensive, and to latch onto a discarded section at a junk yard, or construction site, is a find close to gold. It’s heavy, and hard to maneuver in the forge, and it’s harder to work on, in the tightening down phase. If it’s a real long piece you’ll have a time keeping your belly – if it’s big like mine – and your elbows off of it. But the end result is really nice.
The bottom is low carbon, “choker” cable, like you find on oil riggers, and boom lifts. Not so great for blades, as it won’t harden properly without a sandwich of high carbon on the cutting edge. It has either a solid steel center, or a nylon rope center, and must be taken apart, and re-twisted before being forged. Lot of work for a crap steel right? As you can see I’ve done just that. I took a six inch section of oily cable, degreased it in my cleaning station, heated it up some to burn off all the junk. Don’t use your normal gas forge for this, as old crap oil, and gunk, will come oozing out of it once it’s reached 600 degrees or so and severely contaminate your forge. No matter how good you clean it with gas, and no matter how clean it looks on the surface, and no matter how much anti-greasing agent you use. Nevertheless, make sure all grease, dirt, grime, and the rope are wholly burned out. I do this in my trash bin – for as of yet out in the country the EPA doesn’t swoop down on every outdoor barbecue. Wouldn’t they love to taste my hot dogs?
Once you’ve burned out the junk, fire up the forge. Now this is kind of tricky, because depending on the carbon content of some of the strands of steel, you might find you’re burning off more than you’d like. It’s a crap shoot when you’re using salvaged materials.
Heat up the cable a section the width of your vice, 3-5 inches if it’s a longer piece. Heat wise, once cherry red, have a pipe wrench, or as I have done, an old style pipe-wrench, pre-set to size, with a two foot handle welded on, and twist the wire down on itself. I try to use counter-clockwise as a goal. As above.
Now bring it up a little hotter, flux liberally just as you would our stacked billet, and continue twisting in the vice, until she is as tight as you can possibly get her by hand.
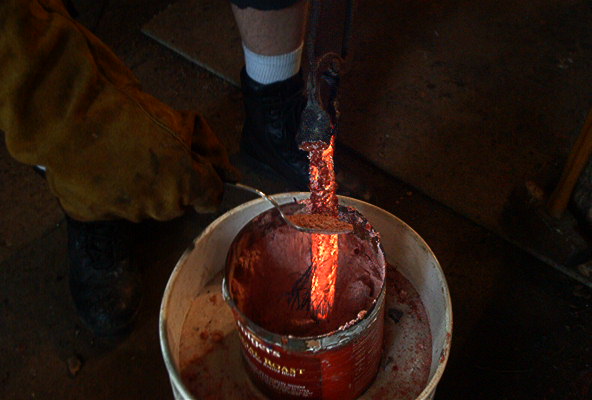
Flux liberally
It’s time to start forging it solid.
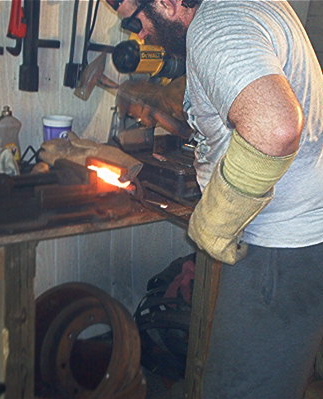
Starting to forge it solid
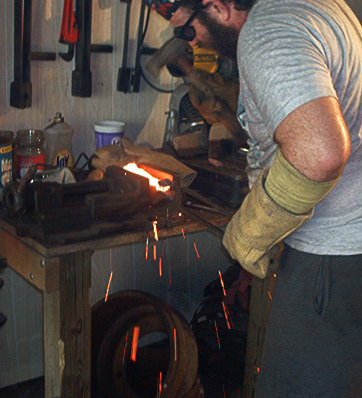
Using a swage
I use a swage, just a little smaller than the stock being used, and twist the billet as I go, following the roll of the direction of the cable. See how the end is acting like a tenon? At that point it is a solid billet, and ready to be formed into what ever you want it to be.
And here is the long 2″ wire in the first picture up above, welded solid, and drawn into a blade billet. I have not finished it into a blade as of yet, this will be posted soon after I do the pic’s for welding on a high carbon edge.

Cable damascus
So that’s cable “damascus”.
Below is a nice shot of a finished piece. Done in chain-saw blades. Same idea as the wire, but you just forge down a glob of chain-saw blades. Each chain saw has three different metals in it. The tip is usually some sort of carbide, the pins holding the chain bodies together is high carbon, and the bodies are a lower carbon steel.

Finished piece done in chain-saw blades
Here’s a guard made of it. See the puzzle patch look of it on the bottom left?
Pretty cool pattern.
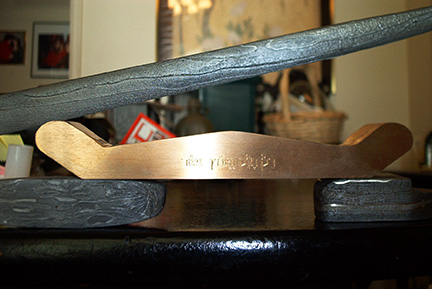
Collection of various finished pieces showing welded pattern
The pommel on the bottom right is straight laminate with some pure nickel thrown in for effect. And for the record books, the thin dagger on top, under-welded and over-etched is my very first blade. Never sold it, but I still have it. Sentimental reasons.
One of the most beautiful wire damascus knives I think I can remember is one of Jim Ence’s in the book: Points of Interest, Volume II ( ISBN 0-9613834-2-9 ). If you can beg, borrow, or steal a copy, they are very collectable now, as only so many were made. I don’t have permission to publish the picture here, so I may not, but you can also see nice pieces in books still in print. Try Decorative and Sculptural Ironwork: Tools, Techniques & Inspiration by Dona A Meilach, 2nd Edition 1999 ( ISBN 0-7643-0790-8 ) for our craft pages 199-234. And as already mentioned, Col Jim Hrisoulas book The Complete Bladesmith, back cover, left pic, and on page 150-153 of his book for how too.
From Furnace to Blade
Now we reach the climax – the sword itself.
So we’ve re-stacked the final nine billets (there were 7, lost one, leaving 6, then took an almost ruined one, and made it into three very thin billets, and now re-forge-welded them into a mass of homogeneous steel of well over 200 layers of material).
We have begun to draw them out into a blade shape. The blade shape chosen, and blue prints drawn on paper, by moi, are of a Roman-Celtic blade called a Spatha. It’s a Gaulic La Tene era Celtic Tribal blade in fashion since the La Tene era blade was adopted by the Romans and others, for use in Calvary and chariot attacks. Longer than the Gladius, rather thin, from between 1.25-1.75 inches wide, with a blade between, 27-31 inches long, and 32-38 inches overall depending on what type of handle, pommel, and guard chosen. The “Celtic-Germanic-Irish-Scotti-Pictish” versions have more ornamentation, and are not Romanesque in decoration and scabbard. I hate Rome, and it’s Imperialist ideals, and so I always choose to lean towards the “Celtic” Sarmation, Pictish, Pritanic underdogs, of the era.
So we start by drawing it out. Our goal is to leave enough stock to be able to have the linticular or diamond shaped grind to the spine, and edges. Will make sure it is (“distal tapered”), and that the shoulders, riccosso, and tang are substantial enough to allow for the abuse that such a weapon must endure. Unfortunately at this point I do not have shots of all these stages. At the time this blade was being made, we were in the midst of moving, and my wife, the photographer, was not always available. In the photos you will see the jump in the shape of the piece between the beginning and near the end of completion.
And it begins.
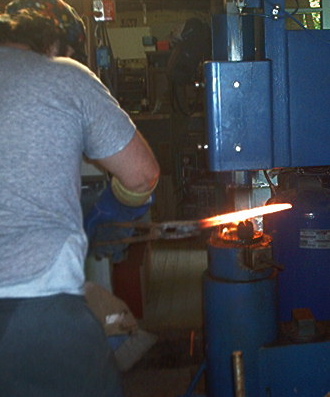
Starting to reveal the soul of the blade
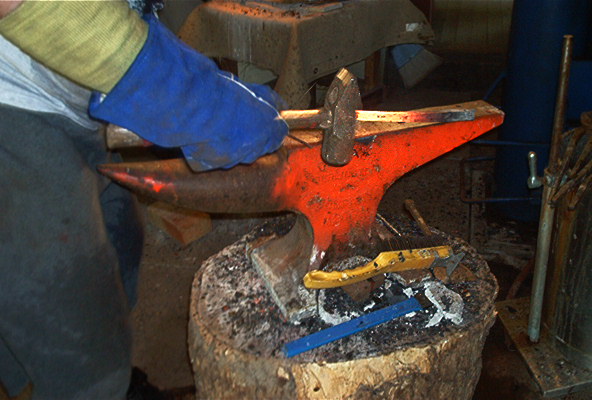
The brush and chisel are still needed at this point
Starting to reveal the soul of it. Got to keep it happening both ways. Notice the wire brush and chisel still sometimes necessary. Always remember the more you do hot, the less you do with grinders and files later.
You can’t see it well in these shots, but it’s more than a half inch thick.
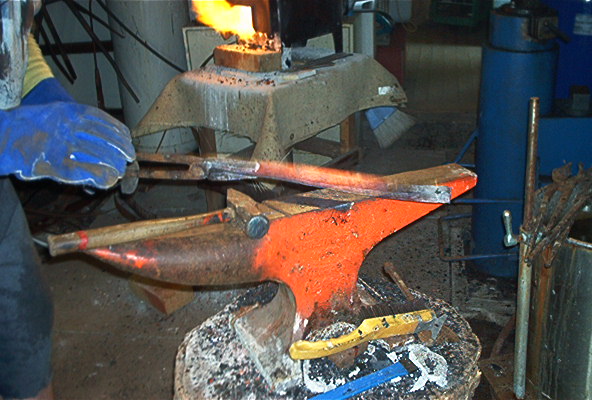
Working the blade
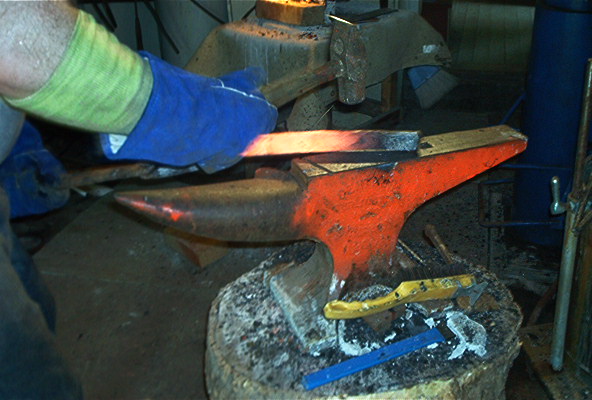
Continuing to work the blade
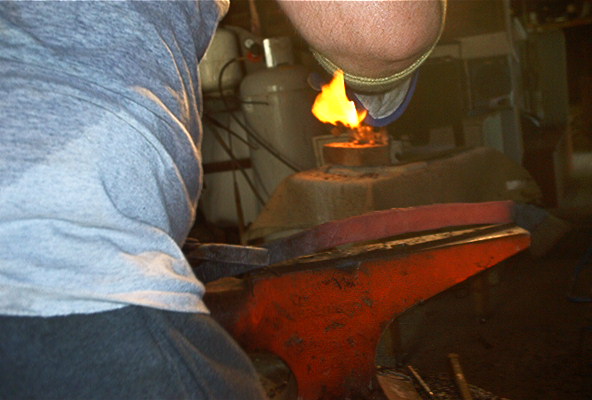
Keeping the blade straight
Here I’m trying to stop problems before they start, by keeping the whole straight. You must concentrate on the blade’s flatness, as well as the edges that seem to have life of their own at this point. If you’re power hammering, make sure to turn the blade over at each pass of the hammer. By “pass” I mean that I count blows 1-2-3-4-5, flip, 1-2-3-4-5. Even so the dies on the hammer get worn, and start to favor one side or another in the diameter of the radius of the fullering die. Thus one side or the other of a billet will “bend” towards the side getting the most pressure.
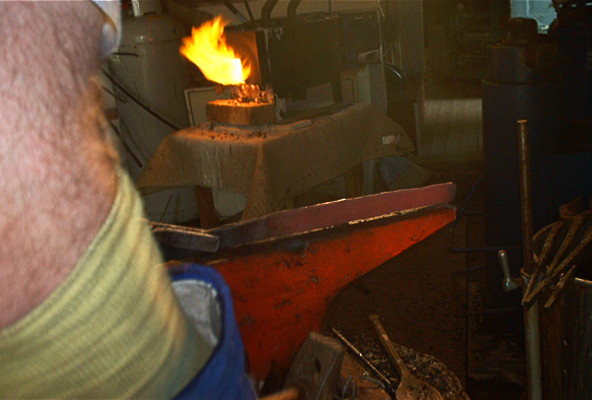
Keep the blade flat even though it may favor one edge over the other
Here I’m “packing’ the edges. Quite some time, maybe two hours, has passed, to get to this point. Work in mid tolerance temperature wise, and be patient. This stage defeats most apprentices. But as you will see the blade must go from thicker – both ways, wide and long – to thinner.
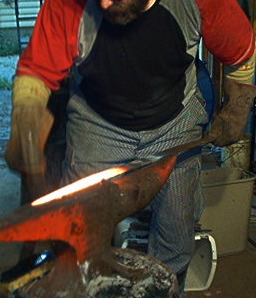
Packing the edges of the blade
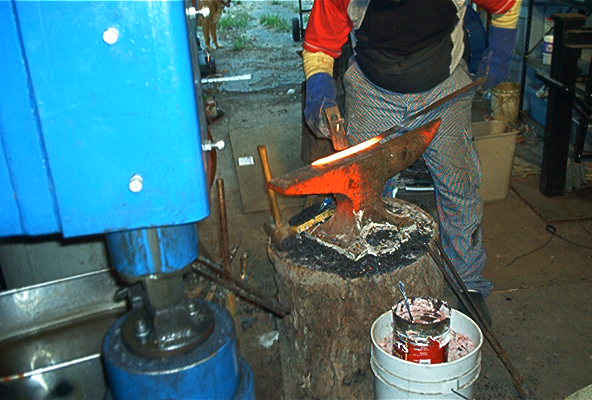
Smoothing out the rough spots
Just about there. As you can see, the tip is a little too narrow for a strict La Tene blade, and had to be fixed later on. Smoothing out rough spots. First one side then the other.
So that’s it for blade shape, and distil taper forging.
Now it’s working on the tang, milling fullers, or hot cutting them, depending on your preference.
Then carving or forging guards, boring out handle materials, and possibly tapping and dyeing a tang nut. Or fashioning a pommel to be peened. Depends on the era, and how much knowledge we have of the original. I never got a picture back of this one finished. It went to a gentleman in Texas, who wished for his health’s sake not to be mentioned. What ever? But here is another Spatha, my 6th of this era, and in my opinion to date the best, with my “Pictish”-Shield, and an Old Spanish, “Iberian” saddle.
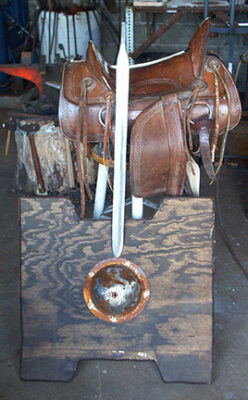
Pictish-Shield and an Old Spanish Iberian saddle
Once I get this one handled and etched, with a period scabbard it will be on here and the websites My Armory, -Lord willing- and Sword-forum International.
And to end this part. The reason for my success. Dr. Melissa R. Shyan-Norwalt who without, I would have been a miserable failure.

Robert and Melissa
That’s Clan Hay colors, and badge. Serva Jugum!

Four cored reversed twist billet
Now for a gallery showing some fine examples of this technique. This is a four cored, reversed twist billet by Charles Kain. I handled it, and love the pattern.
What follows are three shots of a long seax of my making.
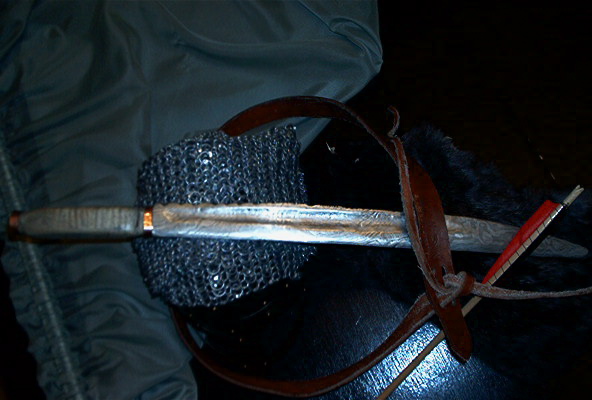
Long seax

Long seax

Long seax – edge view
Below, straight laminate seax, a reproduction of a weapon from 300-900 CE.
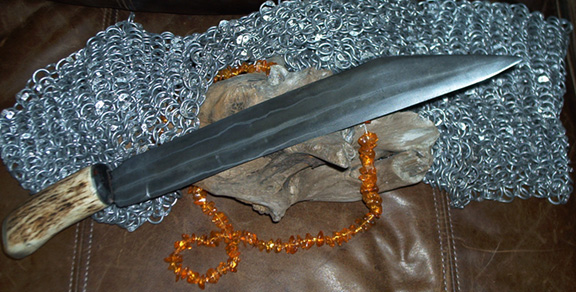
Straight laminate seax, a reproduction of a weapon from 300-900 CE
Modern fantasy dagger

Modern fantasy dagger
277 layer bowie-seax hybrid.
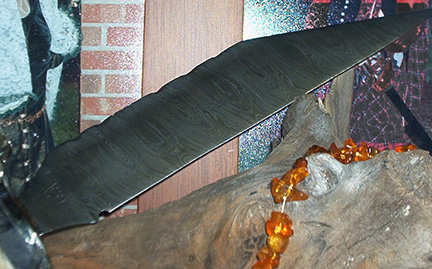
277 layer bowie-seax hybrid
And my drawings for a Peterson Type H reproduction not yet complete for Mr. Andrew Babbini of Hawaii.
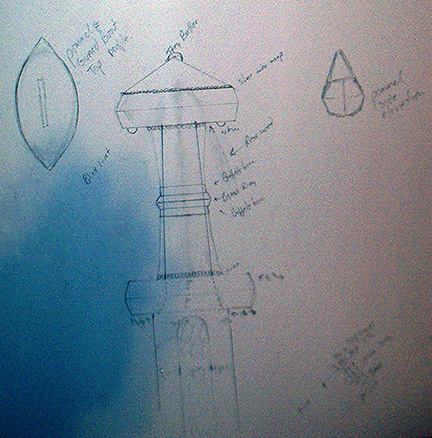
Drawings for a Peterson Type H reproduction not yet complete
This is strictly an “art piece” Tanto. Nine different metals, with lots of 200 N Nickel

An art piece Tanto made with nine different metals with lots of 200 N Nickel
It’s sister piece, a fantasy wakisashi.

A fantasy wakisashi
Cross locket.
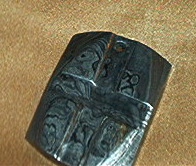
Cross locket
Pattern detail up close.
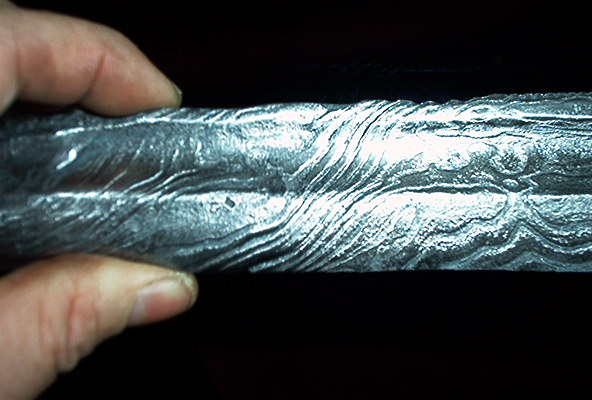
Pattern detail up close
Letter opener.

Letter opener
My own Scottish dagger. This was made with 300 layers of the same material, ( L6 meat cutter blades, about .006 thick. India stag handle, and my Clan Badge in the Pommel.

My own Scottish dagger
I hope this was a blessing, and that someone benefits from the use of this tutorial.
Robert P. Shyan-Norwalt
Hammer Forge and File Inc
St. Joseph, Missouri USA
Colossians 2:8
Text copyright Robert P. Shyan-Norwalt 2006
Photographs copyright 2006 by Melissa Shyan-Norwalt.
Melissa Shyan-Norwalt asserts the moral authority to have her name associated with her photographs.

Nice write-up on welded cable! I would like however to take the Devil’s advocate position on your statement about galvanized cable. I have used a great deal of this material as it is available, and most of what I have handled, is real high in carbon with a larger wire diameter. I simply soak it in muriatic acid to remove the zinc and neutralize in baking soda sltn.
The acid in not such a monster either, and if used with proper judgement, nothing to fear.