The Creation of a Pattern Welded Blade
A Tutorial by Robert P. Shyan-Norwalt
…One, an ingenious smith, can make many weapons for use in war when he forges helmet or hip-sword for human combat, or battle-corselet, shining blade or shield’s disk, and can weld them firm against the spear’s flight.
from the poem The Gifts of Men, found in The Exeter Book (c975 CE), translated by S.A.J. BradleySuch a one is blade smith Robert P. Shyan-Norwalt of Hammer Forge & File Inc., a hot forge smithy in the heartland of the United States. Robert has most generously consented to present a detailed tutorial on the alchemy he practices every day – the making of fine pattern welded blades as was practiced by the Anglo-Saxons, Vikings, and many other cultures whose lives depended on their steel. This first portion of the tutorial covers modern methods of forging and stock removal for the beginner. Part Two will cover “Period Methods of Pattern Welding”. Part Three will be called “From Furnace and Ore to Blade”. I am very happy to present the work of this most talented blade smith. Octavia Randolph
Often imitated using modern etching techniques, but never duplicated in it’s grandeur, the pattern welded blade is a thing of magic.
Robert P. Shyan-Norwalt
I’ve heard so many romantic explanations for this phenomenon. Why would any man choose to love this steel the way I do, in the day and age in which I was born? A Vulcan would go crazy trying to figure it out! For Jim Bowie and Davy Crochet it makes perfect sense. For Alexander the Great, and Hannibal? What’s to wonder about? They were using the Atom Bomb of their day: Pattern welded steel!
 When I was a wee lad of barely five years old, I saw a picture in a dictionary of a centaur. Half man, half horse, and he had a sword in his hand. And I was hooked. And I saw the old Steve Reeves “Hercules” movies, and I was hooked deeper. Then Conan the Barbarian posters by Franzetta, and comics by Roy Thomas and Barry Windsor-Smith. Then came Arnold’s first Conan movie, and I knew before the opening credits were over, what I was going to do for the rest of my life. The Riddle of Steel!
My formal introduction to the weapons of men, beyond squirrel hunting with Uncle Don, and shooting clay pigeons with a highschool chum, came three weeks into my military basic training in Spring of 1979. It wasn’t the high powered rifle with it’s awesome, long range killing ability, and the devastating effect of it’s 7.62 steel jacketed round that shook me up -so much as the bayonet that clips on the end. Up close and personal.
I got out of the Service -US Army Airborne – in July of 1994. That same year I went to a Civil War Reenactment near Elnora, Indiana and saw a Blacksmith working on a Kabar style – bowie, I found out later -knife, and I watched him for hours. The steel seemed to move, in and of itself.
“What’s that”? I asked pointing at the blade.
He knew instinctively by the tone of my voice that I wasn’t asking what “kind” of knife it was, or what era in which it belonged. He knew I was asking about the steel itself. “That’s Damascus” he said.
“Teach me how”? I asked. But I wasn’t asking. I was demanding, and he knew it. He ignored me for some hours. Finally towards the end of the day, as I had stood shocked silent for many hours, and I wasn’t going away, he invited me to his shop for a few lessons. That’s been 16 years, and I’m still freaked out by it.
I’ve decided to show the modern method first, which will help more people get started sooner, with less fuss and confusion. Many folks get discouraged before they even begin, for any number of reasons. Perhaps they don’t have a place to smith. Or they are under the assumption it will be cost prohibitive. Or with no Master to teach them hands-on, they lack confidence. Finally once they do begin, inevitable failures are felt to be permanent, and people give up.
It’s all about desire. If you really want to make a pattern welded blade, You Can Do It. And with a little patience, time, and fortitude, make a blade you can be proud of. Later we will do a series: “From Furnace to Blade”, smelting both Iron and Steel, and pattern welding our own Migration Period blade using the methods of the ancient Gaulic, Roman, Frankish-Merovingian, and Viking Smiths. We will compare this to the Japanese, and Philippine-Indonesian methods, and be blessed by the lot.
One may get as “authentic” and “purist” as they wish, following traditional methods, which we will deal with later, with no disrespect from this author. I love to do it, “like they did it”. But for the bottom line on my profits, and coming out at least even on taxes, that’s not always such a great idea. I believe everyone in the genre has something to offer. Some -like myself- do at times along this Bladesmithing Journey take the time to go from raw ore to gleaming razor-sharp-blade putting aside all thoughts of profit, and “getting what it’s worth”. Ancient smithing, … It’s a thrill like no other, and instills a respect for the metalworkers of old. I started off with a $5 charcoal brazier, $10 lady’s hair dryer, $2 used and abused ball peen hammer, and a free six-inch hunk of railroad track for an anvil. It wasn’t fancy. I didn’t work fast. But it worked.
Others, myself included, buy modern materials, and use them for plain stock removal. Sometimes in the beginning my budget was strained, and I was forced to use recycled materials. For example: I may use a range of scrap-yard materials ranging from recycled wrought iron, motor car leaf spring steels, farm implement spring steels, tool steels, etc, and arrange billets and forge welding them, and following this, use stock removal and machining methods, to produce wonderful exotic patterns in the steel itself. Functionally and aesthetically speaking, some of the most beautiful, resilient, tough blades ever made in the history of mankind were pattern welded. And as I am showing here, salvaged old steel from truck axles, saw blades, plough shears, can be used to reform the modern steel into an sword, spear, axe, seax, or knife. With the advent of modern equipment, and the fact that most people reading will be “city folk”, I suppose we must also acknowledge the strained budgets, limited time, and cramped quarters of our modern world and somehow make a feasible approach to do a ancient art. Not everyone can have access to a coal forge. Not everyone lives in a place where such things are permitted. Maybe you can find schools that allow gas forges in the art department? Maybe you have family that live in the rural areas, who will allow you to set up a little blade-smithy?
There are many ways to approach the pattern welded, and differentially quenched blade. But let’s not comfuse pattern welding with either wootz, or damascus steel. All of these methods, Celtic, Persian/Arabic, Frankish, Germanic, Scandinavian, Japanese, Philippine, etc, are related to some extent, changed but little over the centuries, and are bound by the laws of physics, and yet differ in approach and final outcome.
Often imitated using modern etching techniques, but never duplicated in it’s grandeur, the pattern welded blade is a thing of magic. Most of these methods and procedures have been dealt with in some detail by many great blade-smiths, historians, metallurgists, documentaries, re-enactors, and collectors world over. At the end of this web tutorial, we will offer a bibliography for interested students, to dive in deeper into the pattern welded, bladesmithing world. Scores of books, tapes, and demonstrations are done on both sides of the pond every year. With a little digging on the Internet you can find literally hundreds of sites, and blade makers, to help you along. One of the easiest ways to go forward in this genre is to simply pick up a copy of Blade magazine at your local newsstand.
Everywhere I go I meet a new school that has “reinvented” and “resurrected” the art of the pattern welded blade. Not so. The art has never died out in Asia Minor and Indonesia completely, and in the last 45 years exploded in the US, Great Britain, and Europe.
Let’s get to it. You’ll naturally want to read everything through before you begin anything, so you can get an idea of how the process unfolds. And of course – you will practice the highest standard of safety protection, for your own health and the safety of the environment. Fire is fire.
Modern Method of Pattern Welding by stacking, and folding billets.
1. Steel preparation. First choose steels that “like” to be welded. Stay in the moderate to high carbon ranges. Now, I’m an American, a Hoosier to be exact, of Scottish descent. So I will talk about steels from our American Iron and Steel Institute, (AISI) and the Society of Automotive Engineers (SAE). Some metals, especially in the wide range of tool steels, are very hard to forge-weld easily by hand every time, and can create undue stress against each other while being tempered. On the positive side, these high carbon alloys make great edges, and very tough, resilient blades, that can hold an edge without breaking.
Each strip of steel must be clean of oil, rust, or any contaminate that would later show up as a slag inclusion. In this picture I’ve cut, to length, and width, various thickness’ between 0.030-1/4 inch, of bars of thrice puddled wrought iron from the 1860’s, L6 High Carbon alloy, and Super improved plough shear steel of 1084-1095. This is the “billet” we begin with. Make sure to keep the iron in the middle of the billet. This will allow for three different colors in the final etch, with great color contrast between the iron and steels. The trick here with such totally different product is in the heat treatment – with which we will go into great detail later.
I clean each strip-bar with a 80 grit sanding belt, then clean with TSP (tri-sodiumphosphate, available in any hardware store) solution. I then stack them in a loose billet using low carbon bailing wire, making sure to have the area, and my hands clean. I place the stack in the vice, and cinch it down very tight. “X” wrap the wire, and once I let go, the tension in the spring steels expands to hold tight against the wire. Here I did 7 billets of 28 layers each, for a 196 start off billet, once those were all welded and drawn out, I re-stacked the lot, and with two 1/4 inch bars of 1095 on the final outside weld to ensure less slag off loss from oxidation.
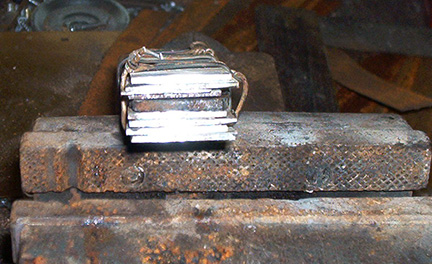
A top view of recycled materials. Using recycled materials is okay, and helps with budget, but the down side is that once in a while you’ll suppose you have “such and such” a steel, and in heat treatment you’ll find out differently.
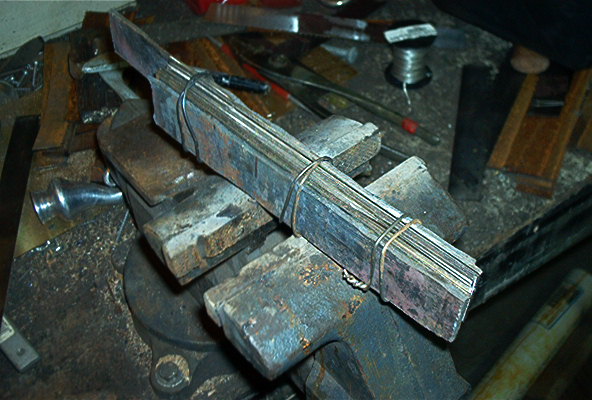
As an example, this is a “short stack” 15-layer billet, for the guard. Notice in this photo the dark wrought iron core.
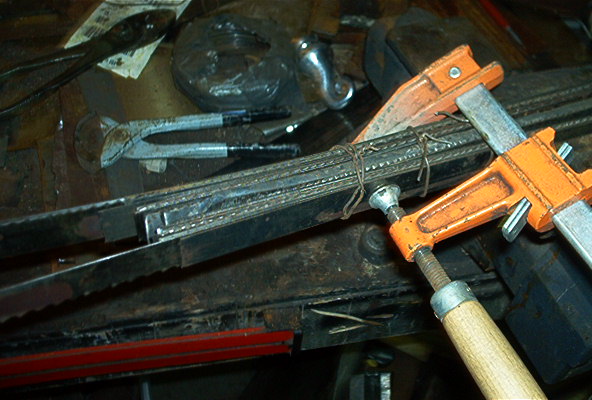
Work one side, then the other.
You can start off with 7-10 very thick layers and hot cut and fold them. You can do as I’m doing here and start off with 20-50 very thin layers and weld them, -clean and again stack them. There’s no such thing as “cheating”, unless you “bill it” a certain way. We will show pictures later of both of these methods and you choose what’s right for your needs.
Now let’s talk about fluxing, and that first ever critical weld. If you’ve ever noticed, each modern welding electrode is covered in a nice even layer of flux. Without going into a modern welding lesson on flux core, magnesium, high nickel content, Cast iron, MiG, TiG, brazing, and all the fluxes for each material being welded, I will give a basic overview of the flux used in pattern welding blades of high carbon steels. In modern welding, when the electrode strikes the grounded metal surface, in a 220 amp system, an electrical arc produces an instant molten steel puddle, thus fusing the filler rod into the “trough” created by the power of the electric current and so a “bead” is run along the steel. The filler metal alloy blends with the steel being welded, and since the flux keeps the weld clean, it facilitates a good, solid, permanent weld of one metal to another. That’s not the school-worthy definition, but it makes for the reason why we, as pattern-welders, damascus steel-makers, etc, … must have a viable flux, when making our forge welds.
Flux is not magic. Flux is flux, and it doesn’t do ANYTHING BUT keep the layers clean until you have the opportunity the forge weld them into a solid metal “billet”. You hear all kinds of fantastic nonsense in the smithing world. Some guy’s put metal filings in the flux. Not good for me. I don’t want any metallurgical surprises later on while grinding. Some say to mix the same amount of silica sand into the flux mix, and though it makes for a dramatic “splash” when welding I’ve not been able to ascertain if it actually helps the weld whatsoever. On the other hand what I use works. It’s relatively inexpensive, and did I mention – it works. I use the ol’ standard, with a little twist. I use Mule Team Borax soap. I take the soap and cook it with the oxyacetylene torch, until it bubbles up, the moisture in the soap dissipates, and makes a dry mass. Once cooked to a hard mass, thus without water, it is then sifted, and mixed with one 10th part boric acid, and a 2 lb. can of High Heat multi-purpose welding flux such as the Harris brand™ here in America. Any good high heat flux intended for ferrous metals is good. I get mine from my local welding dealership. I mix it all very well, and re-sift and re-mix it each time I work.
Beware: For safety, always wear safety goggles rated for high impact, and never touch the flux with bare hands. Then…don’t touch yourself, or anyone else without washing first. Don’t touch your eyes, or your nose, or handle,…er,…parts of your body, with flux on bare fingers. Ouch.
The boric acid likes the taste of refractory, and by that I mean, boric acid will readily eat out the insides of your gas forge, and I so line my forges with ceramic plate to avoid having to reline the forges too often, but if you forge-weld a lot, you will now and again have to re-refractory your gas forges. I use pourable, 2800 degree refractory. I also strongly advise getting a pair of didymium glasses when the forging temperatures got beyond cherry red heat. Anything above 900 degrees F (480 c) it is best to have high-heat protection for your eyes.
Not all modern fluxes are suited for what we are doing here with high carbon steels, although many silver solder fluxes can do the whole gambit. But for price, and volume, for what we are doing, -for high carbon ferrous, and low carbon irons the above works great. Don’t use a flux intended for stainless steels, aluminum, or brazing fluxes ONLY, or ones meant for brass, bronze, or copper ONLY. You can’t go wrong following industry specifications, folks.
I don’t just jam the billet into the fire. I set it on the lid of the forge as she’s bringing the temperature up, and hang it in front of the door, and move it back and forth. This to ensure the metal won’t be suddenly shocked. I bring the billet up to above cherry red, in a (neutral flame), and soon move to a (carborizing flame). Once done, I take it back out and apply the first sprinkle of flux to the entire billet, making sure to get down into the layers. I use a tablespoon for this, and hold the billet over an empty coffee can. At first the applied flux may curl up, and slough off, but once the billet reaches near welding temperature, the flux will be entirely liquid, hissing, and bubbling in the forge.
Here are a few shots of the operation. In this first shot, I’ve already made the “cooler” 1st application, and am piling it on very liberally to an orange heat billet. It will go back in the forge until this is very well saturated into the billet on BOTH SIDES.
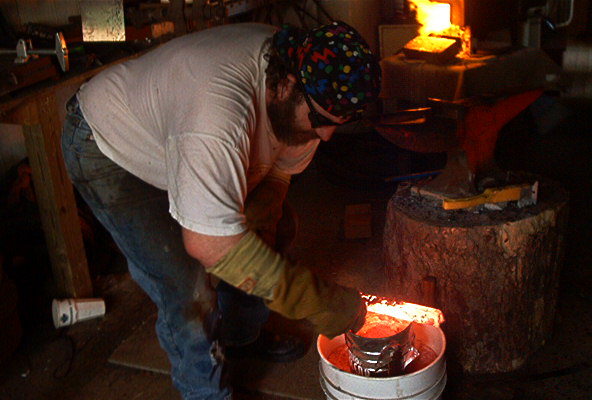
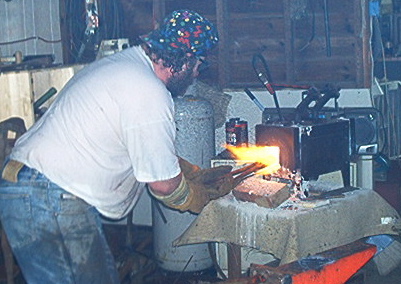 As I mentioned, I have an old coffee can container that I use to re-sift the flux each time I use it. I forge, and set that in a bucket of sand, so I can scoop out the run off later. A little sand never hurt flux. Now back in the fire.
The flux is “hissing” the billet is past orange heat into a deep-deep straw yellow, but not quite pure white. It’s sparking very slightly but not red shorting or “burning” the steel. Lots of really high carbon alloy steels love to red short on you, and will “crumble” on the edges. Wrought iron is like this, and I have a lot of trouble with ball bearing (52100 series) steels too. The temperature range is very critical, and you’ll ruin quite a few before getting this down pat. With your didymium glasses on, your billet should be UNIFORM in color with NO darker spots. Remove the billet quickly but safely and surely, and with your anvil very near the forge, and your hammer in placed on top, and having preheated the surface of your anvil past black heat while you were waiting for the billet to be ready, and now, give it a nice little “kiss”. That’s the only way to explain it. Don’t slam the hammer down proving your machismo. Just let the hammer fall, I use a three pounder for initial welds, when doing it by hand, with “just a tad” behind it. Now if I use an eight pound hammer. I call it my “big dog on a little stick” then I just let the hammer fall on it’s own. It’s perfect for that first trip down the billet.Notice we’ve reached near-white heat on my two burner gas forge; running at 12-15 pounds per square inch of propane, this takes from between 15-30 minutes to reach welding heat. I must say that to get that temperature I was forced to modify the jets inside the gas tube. I took my Oxy-acetylene torch cleaner, and reamed out the holes, until I could get the 2300+ degrees I needed for this operation. I have another forge for ornamental work on which I’ve not bored out the spray holes, and run at only 4-6 lbs of pressure. But for forge welding I run it “full bore”. It’s loud, and it’s hot, and may I say dangerous. Back ten years ago when this picture was taken, I had my tanks in the shop, with fire blankets. I now have a 250-gallon “pig tank” (a gas tank, either propane or natural, that stands upright, and sort of looks like, you guessed it, a pig) outside, with separate regulators, and check valves. I never had an accident, but I heard about a guy who did, and a “word to the wise is sufficient”.
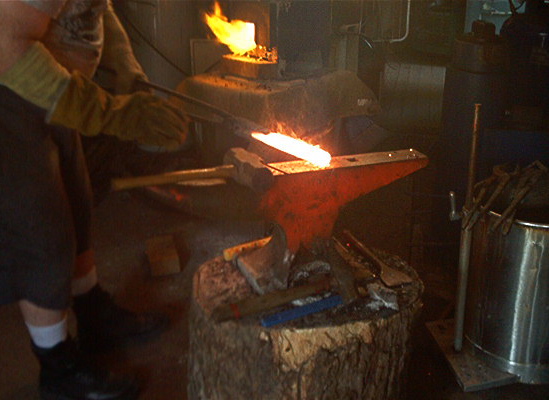
How’d do you’all like those sweats? Sets off the combat boots nicely, don’t you think?
Now below, what we are looking at is the angle of the hammer. No matter if you are a dainty lady smith, or a teen, or a big bruiser with 22-inch biceps, if your hammer isn’t straight, plum, level, and in correct orientation to the billet you will ruin it.
I hear all this “to do” about hammering. Don’t put your finger on top of the handle. Don’t choke up on the handle. Don’t let your thumb rest too high. This is all great lore, and it makes master-smiths feel even more, “Masterly”, but really? Use more wrists, less shoulder? More shoulder less elbow? What ever you do, and whatever “hammer philosophy” you adhere to, do me one favor. 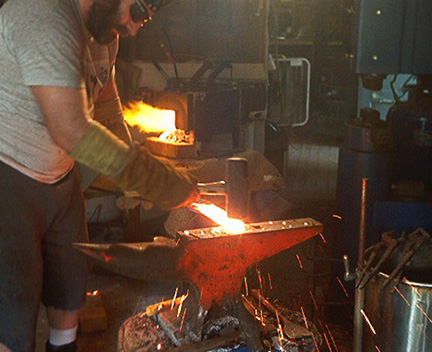 Hammer straight and true and DON”T leave hammer marks on plastic-state steel. Got it? And don’t destroy your body through bad kinesiology. Use all your joints in your strike. Shoulder rotor cuff not being pinched, elbow in line not torqued, wrist involved but not carrying the load, hips squarely aligned, and never take your eyes off your steel. If this means like me, usually working alone, great. Just don’t get distracted and thus…hurt.
Here I’m re-fluxing after some initial welds. Be advised that not every picture is in exact chronological order, because I don’t have professional photographers on hand every day.
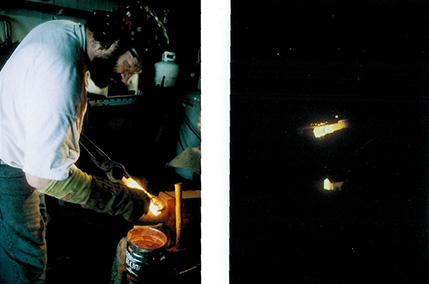 Now I do a quick examination, with my didymium glasses off, to make sure I’m getting a good look at things, and after cleaning the old flux off I can see that the weld is solid, and I’m not getting “light” between layers. If I am getting light, now, while she’s still hot is the time to make corrections. Making sure all areas are covered with flux, and then back on with the didymium glasses to make sure I’m not dealing with cold shunts. A cold shunt is a skipped spot not usually noticeable to the naked eye that will leave your final billet un-welded in places. That is why I insist on uniform heat, and use the fancy glasses to make sure I’m not being fooled. Different billet on a different day, but it’s a good shot of a billet after the initial weld, and after knocking off old flux, new is being applied.
I also will put a word about hydration in here. Working in these temps, it can get 130-150 degrees F (54-65 c) in a shop, and one can seriously become depleted of electrolytes in a very short time. So drink plenty of water or electrolyte beverage, and be careful.Now after two or three trips to the forge it’s beginning to draw out, and I’m letting the forge cool down, to a working temperature. About 1000 degrees. Notice how hot those tongs are? Nearly as red at the billet! That’s why you see Blade-smiths with gloves, kevlar sleeves, and a water bucket just for tongs, whereas a General Smith may get away with no gloves at all. Not me Dad! I only had to have a glop of hot molten slag go down my boot once, and I only touched ONE hot billet with bare hands. In our business, paranoia = less scars, less pain.
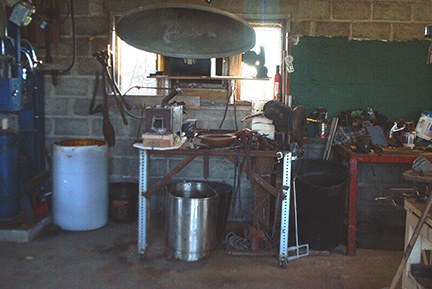 Let’s talk about shop layout. It’s very important to have your quenching bucket(s), tank(s), – whatever you end up using – near to your work while forge welding. I make this somewhat easier and less aggravating by having just about everything in my shop on wheels. I have my anvil and stump, when not in use, off to the side on a four wheeled industrial cart, so when I need it, blam, -tips off a platform to set solid while I work. One gas forge, tanks, welders, cutting torches, vacuum, swages, saw tables, tool-boxes, and anything else I can manage, is on rollers. My shop space is limited, and I find this helps me keep things in order.
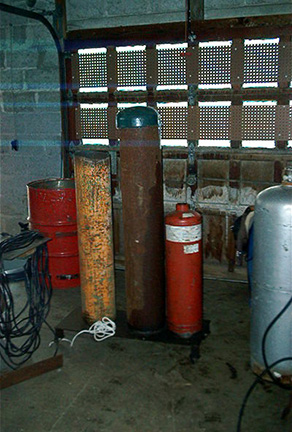
My rolling set of three upright quenching tanks.
Then I have a rolling set of three upright quenching tanks, for longer sword-blades. The tallest and the shortest are oil, and the one on the left, -an old oxy bottle, is brine, and I also have a 4″ PVC vinegar tube for mill scale cleaning down in my etching room in the basement of the farm-house. I got all of these at the scrap-yard for .20 a pound. The 1/4 inch plate was a gift from a friend, and the all steel casters cost about $7 each. Not a bad rig. Not in this pic, but now it has a moving handle, and kayo-wool lined lids for the tops to help with flash ups. Since I usually do the blade quenches out of doors, with a rolling forge, it’s not a big deal.
I have one 33-gallon stainless steel tub -see above under my main forge- filled with old motor oil, and the same in a small farm bucket for smaller jobs out of sight.
Also have a few fire extinguishers on hand as you’ll have molten slag spraying out in 360 degrees -tends to be dangerous even if you’ve fire-proofed your work area. See below.
This is a 100-pound ram, “Big Blue”. I got it used, just one year old, from Jeff Woods of Frankfort Indiana, no time on it, and once I tweaked out some design flaws in the piston, and set it up on concrete, and fixed the air cylinder from working its way out of the ram head, she has served me well for almost ten years. I run it off a 17.5 horsepower, 80-gallon dual stages upright air compressor (see below). So long as I don’t stand on it for hours, it is sufficient for drawing, swaging, punching, fullering, butchering, and other tasks. I hear that the boys at Big Blue have fixed these problems now, and according to Uri Hofi, you can do even more and better with the new model. As a pattern welder, it is more’n ’nuff for me.You can forge weld with your motor actuated power hammer, or air hammer in my case, but it takes practice, skill, attention to detail, and a soft touch. Don’t be fooled by the look of this “little bit” hammer. Sure, compared to the old 250-500 pound rams of our forefathers, she is a lightweight for sure, BUT it’ll still jam your elbows up to your eyeballs, and will wrench your wrists off, if you get the billet off level. Once, and only once, to my chagrin, I allowed myself to be distracted by an apprentice in mid-stroke, and I had tendonitous in my tong-holding elbow for about a year for my foolishness.
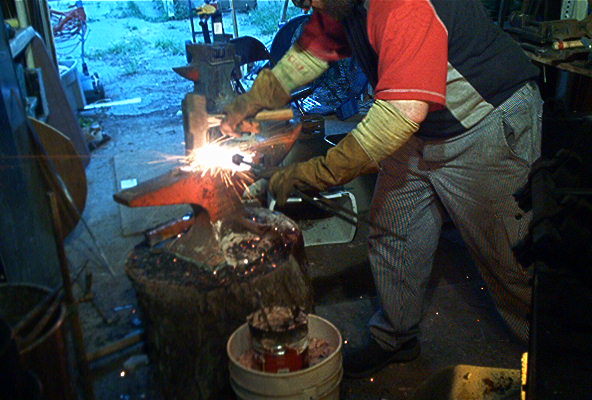 Let’s mention the oil and brine quench. I have experimented with transmission fluid, used light-weight motor oil, tung oil, linseed oil, peanut oil, all with varying degrees of success for each type of steel. Different quenching mediums are needed for different steels. Some are for Oil, thus the “O” in O1, O2, etc. The “W” in W2 is obviously Water quenching. “A” for air. Personally I preheat both my oil and water using a trough heater you get at Farm and Country stores. I heat the oil to about 100 degrees F (37 c), and the water to about 180 degrees (82 c), especially on Winter mornings when the oil thickens. Why? So not to shock my steels. Think about all those little atoms moving around so fast after you heat them up on a cold Indiana below-zero day, and then boom, you shock them with cold water. You’d crack too.Also in the picture above is my plainishing hammer, work station, “English” wheel combo, made by Mr. Jim McClare of New Lisbon Indiana, a great smith, and genius of a man. No blueprints. Just makes crazy stuff like this, and I’m very thankful for his wisdom. My Burke slit mill, air compressor, and the ever-wonderful pegboard. I have an 16 inch I beam running he width of the shop, with a air hoist, pulleys, rail runner blocks, for moving this stuff around when I need to. That wasn’t always so, and I had to do things the hard way. Notice I have my power for modern Arc welders, and 220 for the square wheel grinder hanging in the middle of the shop.
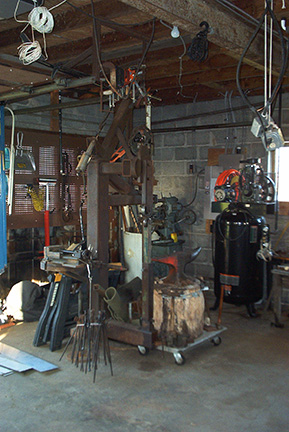 There are also Air hardening steels, and it is VERY important to have the right medium, used at the right temperature, in the right way. Otherwise you here this “TINK”, and you have a real nice stress crack on a blade you’ve spent many long hours, forge welding, grinding, fullering, etching, etc. The problem with pattern welding is, you soon realize you just about need a Bachelor’s degree in metallurgy to harden and temper your steels right all the time. Sometimes mixing certain oil quenching alloys with air hardening can be a trick coming up with the right amount of spring, correct toughness, and desired Rockwell hardness in the ever desired “c” scale.
The steels our fore-smiths used were not the super high-alloys of today. But we find today, no matter which blade making philosophy you adhere to? -a performance standard is set in place that can only be matched by modern alloys. Unfortunate for a guy trying to be a “traditionalist” blade-smith. Make a blade the old way with Migration period materials and you’ll see what I mean. Try to convince a customer to use only wrought iron, and 1050 moderate carbon steel in a blade, and then explain why the blade won’t cut through cinder blocks, three foot diameter trees, and achieve greater resilience than hastalloy without 100 degree flex and snap to true. Just don’t expect moderate carbon spring steel to have all the qualities of 52100 and you won’t get discouraged.
For general knowledge, and great reference, I HIGHLY recommend Colonel Jim Hrisoulas of Salamander Armory three books, The Pattern Welded Blade, the Complete Blade-smith, and also The Master Blade-smith. [ ISBN 0=87364-430-1 to get started ] His books and videos have done more for me than anyone else, but I also blow the horn for these great makers. Google these names, and be prepared to sit and read for awhile: Vince Evans, William “Bill” Moran, Don Fogg, Daryl Meyer, Kevin Cashen, Charles Kain, Wally Hayes, Billy Marrett, Jake Powning, Patrick Barta of the Czech Republic, Ivor Lawton of the UK, and Yoshindo Yoshihara a fantastic Japanese Master-smith. Who’s the best, greatest, most talented? I have no way of judging but these are the Masters that helped me along, and hopefully someday, I can be that guy for a few good men and lady pattern welders.
Back to our blade. At this point I’ve taken 7 billets, as stated before, forge welded them all into a solid mass, drawn them into bar shape, and using a chop saw, cut them into usable lengths.
One down side to using a chop saw is that it removes a lot of material. Not so much as a torch, but more than a band saw. I have all three, but take the toss up between the 1/6 of an inch or so loss of material to the time it takes to set up the band saw for each cut. Your mileage may vary, and there is no right or wrong here.
Final draw on one of seven billets, paying special attention not to get it thinner than 3/8th of an inch. This is the last time I work this particular steel this hot until the next forge-weld.
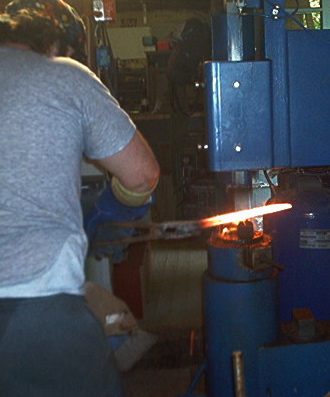
Final draw on one of seven billets.
Now I will clean up the cut layers, using an angle grinder. I have a friend of mine who has a nice surface grinder for this phase, that gets the billet much cleaner, flatter, and more uniform, which is a huge boon in terms of avoiding slag inclusions.
I did a small somewhat scientific test on slag inclusions when I first started, and whether I hot-cut, and folded, or twisted rods – as we will in the Period Technique tutorial – or as here cold-cut and re-stacked billets, I found that for me, the amount and frequency of inclusions was fundamentally the same. Problem is, hot-cutting, folding and rewelding in place takes three things: You to call the shots, a Journeymen, who doesn’t mind having his shots called, and one at least, or maybe two apprentices, with hammer in hand and the knowledge, patience, wisdom, and common sense to use them. And “that ain’t always possible”. Matter of fact, unless you’re at a Renaissance Faire, Society for Creative Anachronism event, or a college environment, it’s almost never possible. My best two apprentices are a screw press and power-hammer.
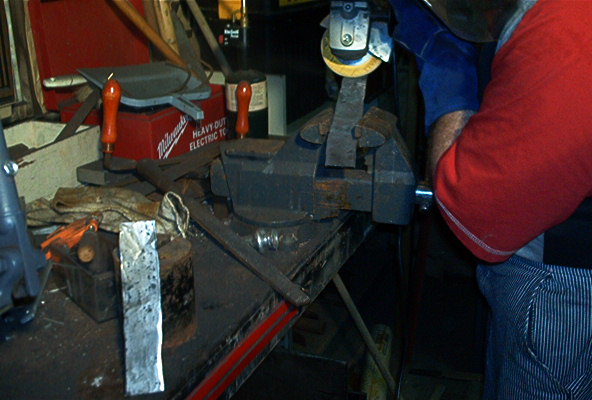
Cleaning up the cut layers, using an angle grinder.
To the right are the six billets. Only six. I lost one to a bad weld. And have another that is on the “verge”. Look at the forth one from the left. See that nasty little black line on the top of it, and the “curl up” on the same side bottom? That’s a bad weld. Looks like the middle layers were a little longer than the top layers, and it “stair-stepped”. I knew I could fix that, and thankfully I did, but that is the pitfall of recycled materials, and starting off with less than uniform cuts of steel. But these things happen with perfectly cut steel as well. Be aware of it, don’t make excuses, and don’t ignore it, but unlike many of my friends who just toss it into the scrap pile as a complete loss, I try to salvage as much of a mistake as I can. What I ended up doing is; forging that billet very thin, cutting off the cold shunt, re-cutting, cleaning, and just incorporated three more lengths back into the mix. Which as a boon from a fool bumped my layer count back up over 200.
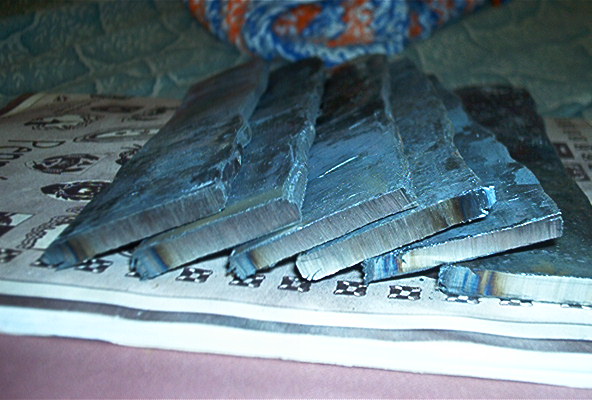
Six billets forge welded with 25 layers each
So here are the six that are left, leaving me at that point with approximately 168 layers. Now I say approximately because of “slag off”. No matter the oxidation level of your flame in either gas or coal forge, once the hot billet hits the warm anvil and begins to cool, and you begin to work the steel, you will have quite a bit of slag off. I have friends who go to the trouble to “wrap” the billet in a mild steel tube, apply inert gas as they forge (a technical, very advanced method) and others who will wrap-encase the billet in stainless steel foil in the same manner as a heat treater, but I cannot afford either of those processes, and most likely in the beginning neither will most of you, and so learn to cope with slag off. And I account for it before I start. I started off with 28 layers per billet, in the hopes of saving 25 of them. I often leave a lower carbon layer on the outside of the billet, typically wrought iron, or the lowest carbon level of the steels chosen like 1010-1018, so slag-off is not as taxing on my high carbon layers. From others, including two of my mentors, I was taught the exact opposite. But they were not primarily sword-smiths. This works well until you are to the point of saving a high carbon steel for your edge. I go an extra step and forge weld my edges on after the next-to-final draw on a sword or knife blade. Having the low carbon on the outside in the beginning welds, allows “junk” to slag off, and leave as much, “good stuff” as possible, until the edge, “very good stuff” is welded on separately.Some fellows I’ve had encounters with like to pretend that we bat 100% every time up to the plate. But the truth is, now and again things go wrong. Same steel. Same heat. Same technique. Same forge. Same attention to detail, and same blade-smith, and still, once in a while things just go FUBAR. For definition of FUBAR see the George Lucas movie: Saving Private Ryan. It’s “R” rated, and maybe not good for Octavia’s site.
Seen below: this is a different billet from ages ago, but I wanted to show a picture of a bad billet ruined by excessive heat. Notice the right side of the picture. It’s solid, and welding fine. But I burnt off the top layer of 5160 spring steel from an old pick-up truck leaf spring on the bottom left, which exposed the L6. I had no drop in gas pressure. I had prepared the entire billet the same way, and yet the layers on the left, once burnt WOULD NOT RE-WELD. I took this billet up to white heat, trying to salvage it, and got back-fired on in a humiliating fashion. Just one of those lessons I needed to learn. I ended up cutting the “good” off, twisting it, at welding temperature, and using it for a Viking sword hand guard. I always try and make lemonade out of my lemons or it tends to discourage me.
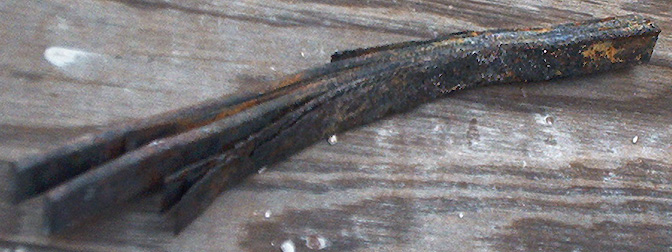
A bad billet ruined by excessive heat.
Unfortunately I only have one picture of this and it is after all the layers are forged. See here. Next is the final forge-welding phase for this particular method.
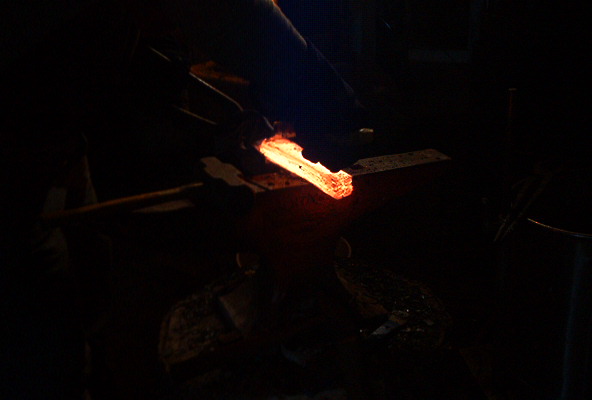
Final forge-welding phase
One thing I want to mention again is make sure you wire brush away all slag, and old flux in between EACH weld, or heat. This keeps the billet fresh, and you can see what you’re working with. You can see if you have “light” between layers, and it also allows you to reapply the new flux where it needs to go.All 200+ layers, welded solid, cooling off a bit, and waiting for working temperature. High carbon alloys like L6, 1095, 5160, 15n20, etc, don’t “like” to be worked much hotter than 1800 degrees. You may end up with “crumbled” edges, called in the industry, “red shorting”, and it is irreversable. When in doubt follow industry specs.
Not to insult your intelligence, but make sure to sweep the flux away from you. Especially if you, like I used to, eschew an apron most of the time.
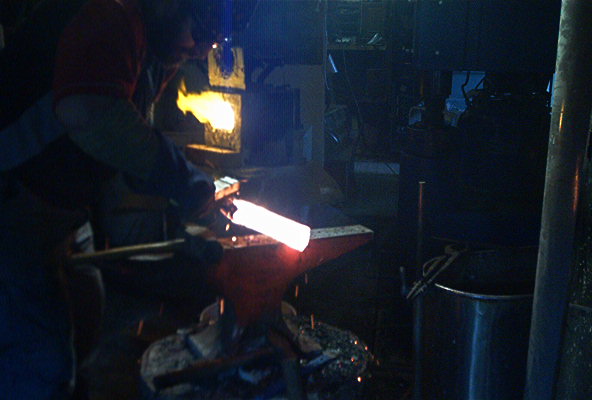
Brushing away slag
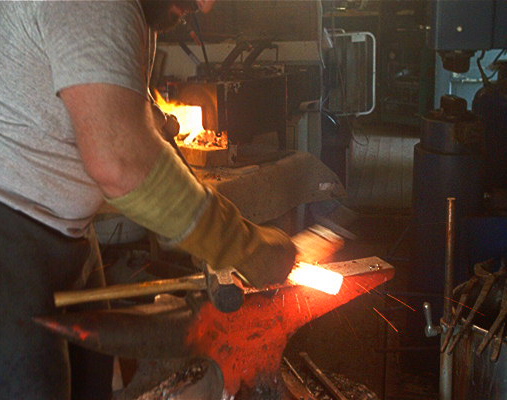
Brush away from yourself
Let’s talk once more about Safety. This is because I’ve learned, the hard way. Pain tends to “learn ya” real well. Go to enough Artist Blacksmith conferences, local Hammer-Ins, Blade Shows, and Demos, and you’ll start seeing the eight and nine fingered Blacksmiths. Guys with glass eyes, and patches. Even guys on crutches, telling campfire stories about the ones pushing up daisies, who weren’t so lucky.Even after 30 seconds of forge welding, the billet will still be very hot, which brings me to preaching.
I’ve had molten slag burn right through sneakers, and even some cheaper leather boots. I danced the jig that day! I never forge weld without steel toe boots, and with either long leg pants, or duct tape at the leg cuff, covering the top of the boot. Thus, I seal the boot top at the leg so slag can’t run in.
You will notice in most of these pictures I have on the following. Gloves. Kevlar sleeves, short and long. For the forge welding, I do now, -some of these shots are seven years old before I got tired of the 1/8″ deep burns on my arms from slag and splatter. I NOW wear HOT MILL GLOVES for all forge welding operations where hot flux and slag are firing out like a cannon. I now wear the apron for forge welding and patterning operations. Don’t like it. It’s not comfortable, and makes me feel claustrophobic. Oh well, once you’ve had a bolt of hot slag lightening slam into your groin, you’ll change your mind FOREVER.
My safety glasses NEVER leave my face, and if one of my apprentices gets caught twice without them, he/she’s out for good. If they are friends or family, they are politely asked to leave for the day. Even with safety glasses on at all times, I’ve been to the optometrist twice to remove bits of either grinding splinters or slag bits that bounced off my forehead into my eye. Not fun.
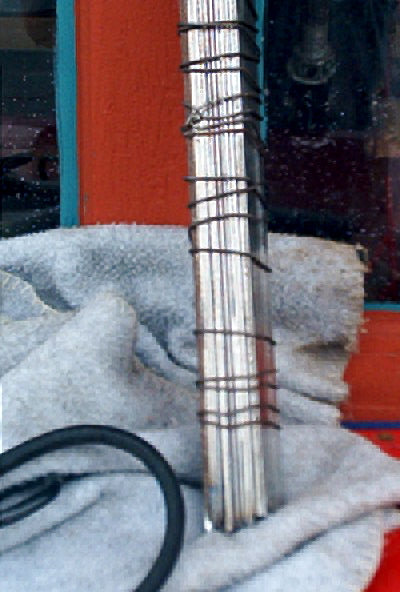
A very large billet
I’ve seen hundreds of demos of general blacksmithing in which guys will forego the use of even welder’s gloves, working bare handed. Doing that kind of smithing doesn’t necessarily require gloves as the heat is very localized on the piece. Somehow some macho pride is fanned from handling semi-hot tongs with bare hands. It’s a free country, but it doesn’t have to be an ignorant one. Not me Jack. I have hot mill gloves for the forge welding, regular insulated welder’s gloves for the usual forge-work -and about five pair of them handy for change outs. In forge welding billets in excess of 2300 degrees F (1260 c), even water-soaked welder’s gloves will shrink from heat right on your hands, and you’ll have to whip them off quickly. I use OSHA approved safety glasses, full face masks, respirators while grinding steel or handle material, and I use eye protection & ear muffs/plugs for power hammering, grinding, chop sawing, band sawing, or when the compressor is running full tilt. It’s not always convenient. Makes it hard to talk without yelling at each other. But after 16 years of full time smithing, I still have my eyes, still have fair to middling hearing, and all my fingers and toes.
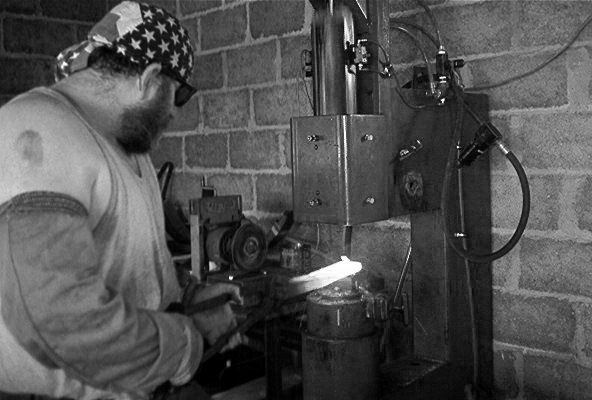 Before we get to the shaping of the final blade in question, I wanted to say a bit about the pros and cons of forging larger billets.
Many of you may already have asked yourself, why doesn’t he just cut to the chase of the original premise, and instead of “making seven-ten little billets, when he could just make one big one?” And I do this on occasion, but it’s tricky, and if you have a failure, it’s a total failure, with much time, materials, and effort lost. I don’t know how it is for everyone, but if I blow $50-$100 dollars in materials down the toilet, it gives me a sick feeling in the pit of my stomach.
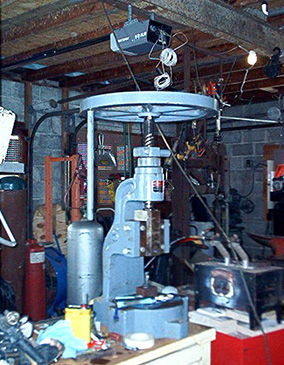
My screw press is a gem.
It’s more of a gamble but fun. This bugger-bear was 2.5 inches wide, X 2″ thick X 20″ long. It’s final draw was over four feet x 3.5 inches wide, of 58 layers of 1050 & 15n20. 15n20 is very high dollar, and tricky to heat treat, especially next to a moderate carbon steel like 1050. But my thinking was, 1050 is close to period, that is authentic, and I needed to try it, at least once. It turned out for me to be 50/50 because one worked and one turned into 20 boot knives. Money’s …money, but the hope was to have two very large bearing swords. “Lemonade, … get yer ice cold lemonade”!
Exceptions. As in all things, I did for once go against my “low carbon outside of the billet” doctrine, because I thought that once it was solidly welded, I’d simply turn it on it’s open side, and draw for final, leaving the two large 1/4 inch thick pieces of 1095 super improved plough shear steel on the outside edge for a blade edge itself. It worked out okay, but next time I’ll go with thinner beginning stock in the “sandwich”, for more layers, and draw her down to 3/16 after patterning. I didn’t have the forethought to not leave my usual 3/8ths and did quite a bit of unnecessary grinding on these two.I made two of these big dogs.
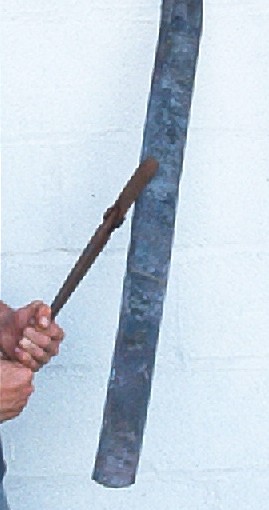
After the final draw
Drawing this Dude was a pill. First off it’s heavy. Required a lot of fullering down the length, because it was ten pounds within six-seven hours I was quite fatigued.
I did the initial welds on my screw press, getting an even, solid weld, 4″ at a time, as my die allows, then started the fullering and draw.
My screw press is a gem. When you run a lone wolf isolated shop, it’s the best helper in town.
Drawing a billet this big takes some brawn, and close attention to detail. Don’t take your eye off of it for a second, and if she does happen to get away from you, don’t hold on to it… DODGE. Once it’s down to sky red, back in the forge. No sense on taking a chance on hurting your arms.
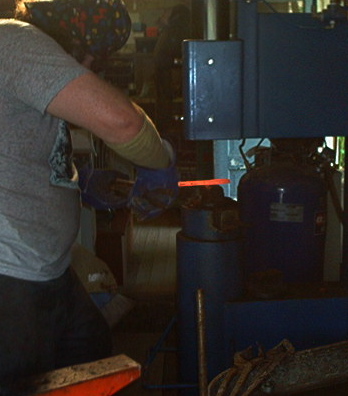
Demonstrating how to use double tongs for a precise draw-back. I use draw forward only when I have the tang shoulders already formed.
This was the last draw in the first billet before grinding and milling my pattern into the first one. In this shot, my son was holding on for all he was worth. Even after slag off it was still 8.5 pounds. Which also goes to show just how much material you can loose in a day of forging.
Below, the High Carbon steel stock removal prototype I did for the blade shape a fantasy leaf blade Shyan-Norwalt version of Mr. Frodo’s Sting. A Sting for just a slightly bigger Hobbit.
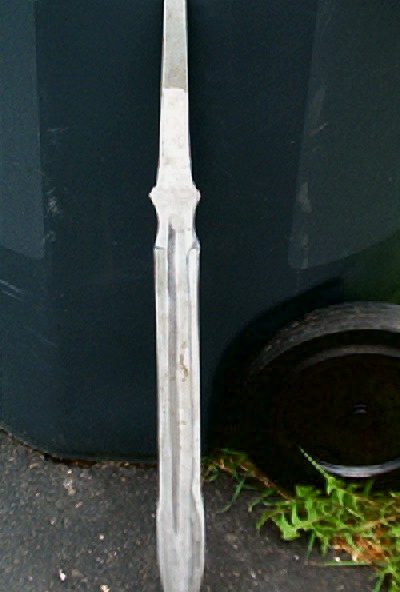
A fantasy blade based on Mr Frodo’s Sting
Vikingesque pommel, 2 1/4 at the tip, 27 inch blade, 12″ handle, made of rose wood, curly maple, buffalo horn, with a faux ivory slab in between two bird’s eye pattern damascus guards.

Detail of the runes and pattern. Sorry for the bleary photography.
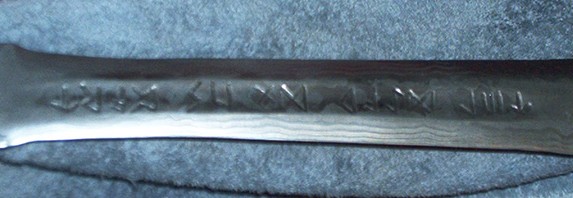
Detail showing the runes inscribed on the fantasy blade
In the next section I’ll talk about wire damascus and show many examples of pattern welded blades.
Text copyright Robert P. Shyan-Norwalt 2006. Photographs copyright 2006 by Melissa Shyan-Norwalt. Melissa Shyan-Norwalt asserts the moral authority to have her name associated with her photographs.

Excellent technique good workmanship and very good final product.
Thank you indeed!